


Project: Finishing a Log Cabin Awning
Location: Woodsy Acres
Season: Summer
Date: July 10, 2026
There comes a point in almost every project where the structural work is finished, but something still doesn’t look right.
That’s where I found myself with the new back door awning.
The posts were standing, the beam was in place, and the roof framing was complete. The beam itself started as a log that I milled flat on three sides, leaving the front rounded so it would keep the appearance of a natural log while still providing flat surfaces for the framing. Structurally, the awning was exactly what I wanted.
But when I stepped back to look at it, the sides bothered me.
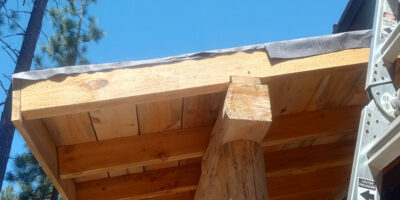
Looking at the ends, I could see things that just didn’t look right.
From the end, I could see the birdsmouth cuts on the rafters, the ends of the ledger board, and all the exposed framing that most people simply cover with a piece of dimensional lumber. It would have worked just fine, but it didn’t belong on a log cabin.
Most people would have finished the ends with a painted trim board from the lumber yard. It would have worked just fine. But every time I stepped back and looked at the awning, I couldn’t picture square lumber hanging off the front of a log cabin. The cabin had spent years earning its character. I wanted the awning to look as though it had always been part of it.
If the posts were logs and the beam was a log, why would I finish the project with square lumber?
That question sent me walking over to my sawmill trimming pile.
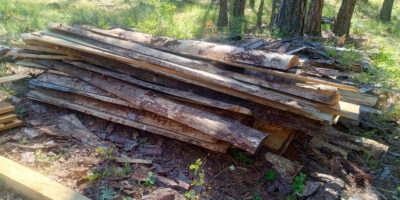
What many people would burn or haul away, I save. Every now and then one of these forgotten trimmings becomes the perfect piece for another project.
Most people would probably call it a pile of leftovers.
I call it future projects.
Over the years I’ve learned not to throw away every slab that comes off the mill right away. Every once in a while there’s one with just the right curve, the right width, or enough character to become something special.
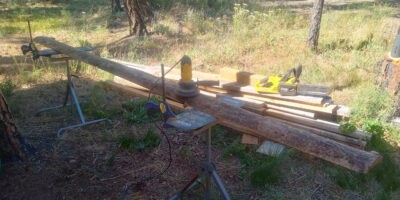
One of the sawmill trimmings before sanding. The natural curve would become the rustic trim for the awning.
After digging through the pile, I found two slabs that looked promising. I trimmed off the old branch stubs, cleaned up the surface, and sanded them until the natural grain began to show through again.
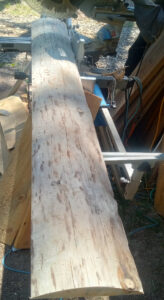
A little trimming and sanding revealed the grain hidden beneath the weathered surface while preserving the natural curve of the log.
As soon as I held one against the edge of the awning, I knew I’d found what the project had been missing.
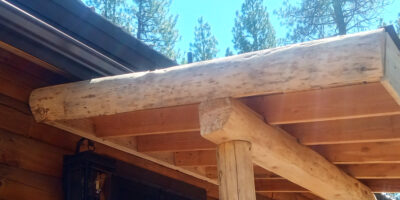
With the trim installed, the exposed framing disappeared, and the awning looked like it belonged on the cabin all along.
Instead of seeing exposed framing, my eye now saw another piece of the tree that has become part of the log cabin awning.
Before attaching the trim, I wrapped the roofing felt over the edge of the roof. Besides adding another layer of protection, it also solved another problem. Because the roof slips beneath the existing eave, there wasn’t enough room to get a stapler underneath to secure the felt. Wrapping it over the edge and trapping it beneath the trim held everything firmly in place until the metal roofing is installed.
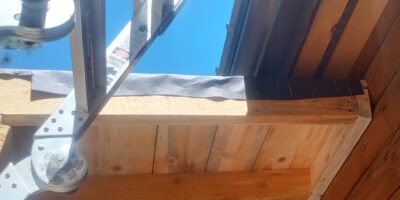
I’ve learned through experience that it’s easier to finish all of the trim work first. Once everything is in place, I can measure exactly how far the metal should overhang the roof edge. That way rainwater sheds beyond the trim and into the gutter instead of running back against the wood. It not only protects the awning, but gives the finished roof a cleaner, more intentional appearance.
Not every project is built the traditional way. Sometimes mountain logic means looking at what you already have before heading to the lumber yard.
The front fascia will follow the same philosophy. Rather than using an ordinary trim board, I’ll use another sawmill slab with a broad live edge along the bottom and a flat face on top. That flat face will provide a solid place to mount the gutter, while the live edge continues the same rustic look across the entire front of the awning.
One thing I’ve learned over the years is that projects rarely tell you everything at the beginning.
Sometimes you have to build them far enough that they start telling you what they still need.
This awning wasn’t missing another board.
It was missing another piece of the tree.
Disclosure: As an Amazon Associate, I earn from qualifying purchases. If you purchase products through links on this page, I may earn a small commission at no additional cost to you. Thank you for supporting Mountain Journal and Woodsy Acres.
Materials
- Two sawmill slab trimmings
- Roofing felt
- Exterior wood screws
Tools
- Miter saw
- Random orbital sander
- Cordless Chainsaw
- Drill/driver
- Tape measure
Woodsy Notes
- I save many of my sawmill slabs because you never know when one will become the perfect finishing piece for another project.
- I prefer to complete the trim before installing the metal roofing so I can determine the exact roof overhang and help keep runoff away from the wood.
- Sometimes stepping back and studying a project reveals what it still needs. In this case, the answer wasn’t another board—it was another piece of the tree.

Continue Exploring Woodsy Acres


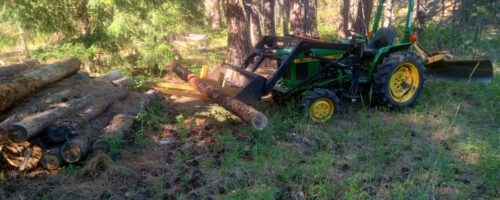
Developing Woodsy Acres, One Log at a Time
Developing Woodsy Acres, One Log at a Time
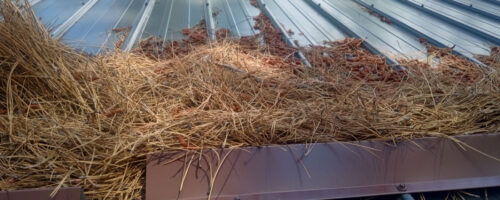
Snow Guards Don’t Just Hold Snow on a Metal Roof
Snow Guards Don't Just Hold Snow on a Metal Roof
